Workspace Management
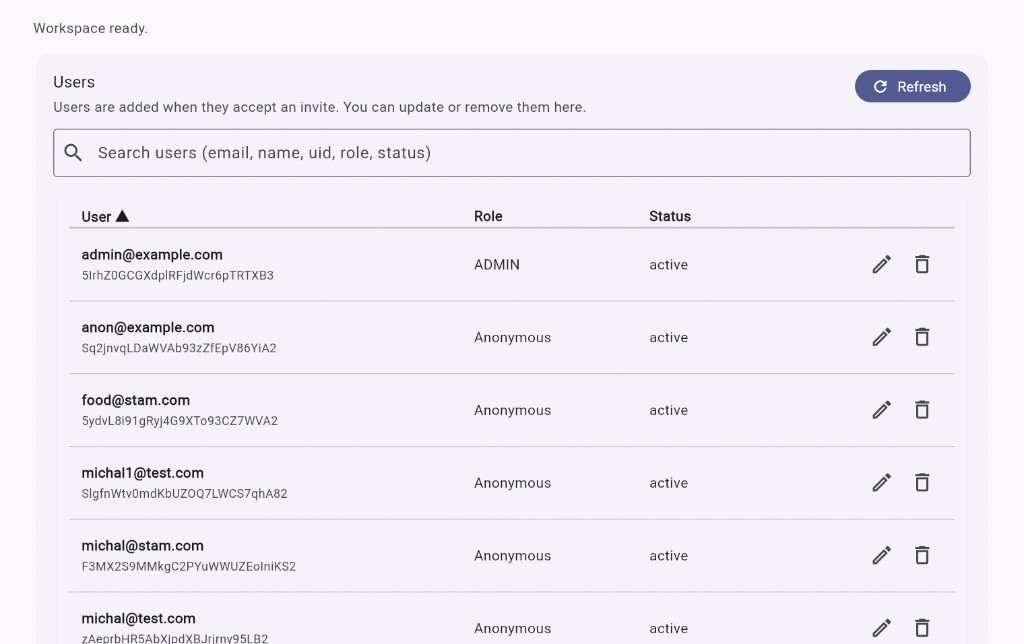
Users
See everyone who belongs to the workspace — owners, admins, and users — and manage access when roles or employment change.
How members join
secureFlows never lets you create a user account on someone else's behalf. There is no “add user” form in Workspace Manager — and that is intentional. Every member must prove their own identity by signing up through hosted login with Firebase Authentication — any sign-in provider configured for your workspace (Google, email/password, and others). You control who may join; they control proving who they are.
New workspace members appear in only two ways:
- Invite — you create an invite key with a role; the recipient opens the link, signs up themselves, and activates. See Invites.
- Anonymous self-signup — when Accept anonymous users is on, a visitor can sign up through hosted login without an invite and receive an isolated space automatically.
The Users tab is read-and-manage, not create. You see everyone who has already authenticated; you update or remove access when circumstances change — but the account itself is always created by the person holding the credentials.
One directory for your whole workspace
You shouldn't need a spreadsheet to know who can access your product. The Users tab is your live membership roster — every person who has signed up in this workspace, whether they arrived through an invite or through open self-signup.
Search by email, name, uid, role, or status. Sort columns. Refresh when you need a current view. It's the same GitHub-settings-style list you'd expect from a serious admin console — without building one yourself.
Invited members and self-signup users
Both paths into your workspace show up here — side by side, in the same table.
- Invited members — accepted an invite and received role Admin or User. They were expected before they signed up.
- Self-signup users — signed up through hosted login without an invite (when Accept anonymous users is on). Their role appears as Anonymous in the list.
Same workspace, same isolation guarantees — different labels so you can tell who was provisioned through your invite flow versus who arrived on their own.
Update or remove members
People change jobs. Access should change with them. Each row has edit and delete actions — update a member's details or remove them when they should no longer belong to the workspace.
- Edit — open the member editor to change fields such as display name, status, or role (where policy allows).
- Delete — remove the member from the workspace. Their sessions and API access for this workspace stop immediately. Removal is audited.
Users are never created on this tab — new members arrive only through invites or self-signup. The Users tab is for oversight and lifecycle management after someone joins.
Owner, admin, and everyone else
Roles tell you what someone can do in secureFlows:
- Owner — created when the workspace is first set up. Full Workspace Manager access. Cannot be deleted from the Users tab.
- Admin — granted only through an invite. Same console access as the owner today.
- User — invited app member. Uses your application and the self-service portal, not the admin console.
- Anonymous — self-signup end user. App access only, same isolation model as User.
Owner and admin today
Owner and Admin currently have the same authorizations — billing, applications, invites, users, analytics, and security. The difference is how they got the role: the owner is assigned at workspace creation; admins are added later through invites.
A few policy details still distinguish the owner row: only the owner may change another member's role, the owner role cannot be assigned through the editor, and the owner cannot be removed from the workspace. Everything else in the console is shared between owner and admin for now.